


Pickling the Last Garden Produce Basic Steps and Favorite Tools

The end of the garden season always feels a little too sudden. One week the tomatoes are heavy, the cucumbers are crisp, and the peppers are coming in faster than dinner can use them. Then the nights cool down, the vines slow, and the counter fills with the last odd handfuls of produce.
That is the perfect moment to pickle.
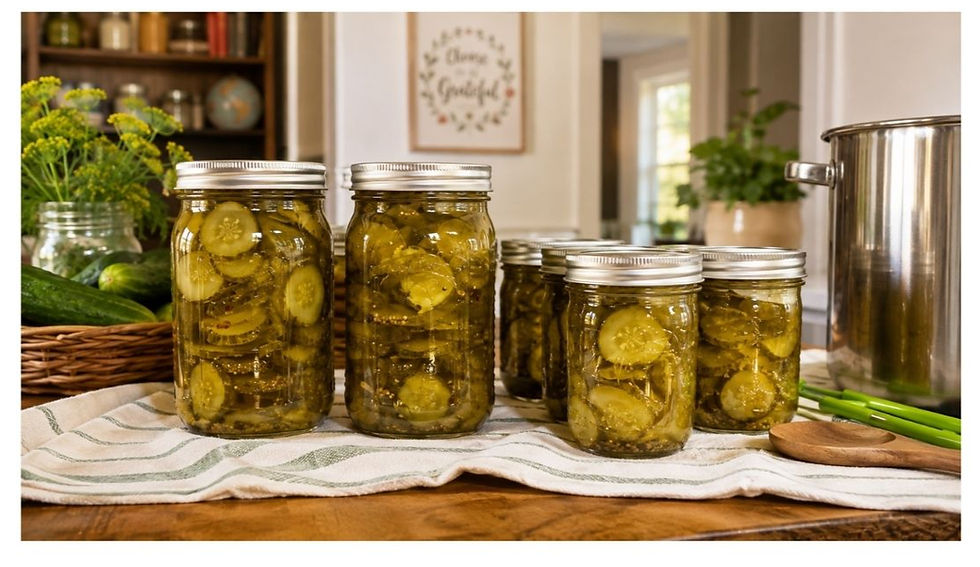
Pickling is one of the easiest ways to stretch the season without wasting what you grew. A few jars of cucumbers, green beans, peppers, onions, carrots, or green tomatoes can turn into bright, crunchy sides for fall meals. You do not need a huge harvest or a fancy setup. You need clean jars, good vinegar, fresh produce, and a few basic steps that keep the process safe and satisfying. I also recommend grabbing a few grape or oak leaves for extra crispy pickles.
Start with the right kind of pickle
Before you pull out the jars, decide what kind of pickle you want to make. There are two common home options.
Refrigerator pickles are the easiest place to start. You pack vegetables into clean jars, pour hot or cold brine over them, chill them, and eat them from the fridge. They are not shelf-stable, but they are quick, flexible, and great for small amounts of produce.
Water bath canned pickles are processed in boiling water so they can be stored on the pantry shelf. This method needs tested recipes, proper jars and lids, and close attention to acidity and processing time.
If you are new to preserving, start with refrigerator pickles for confidence. If you want jars that keep longer, use a tested water bath recipe from a trusted source such as the National Center for Home Food Preservation or the USDA Complete Guide to Home Canning.
The key difference is simple. Refrigerator pickles are for short-term storage. Canned pickles are for shelf storage, and that means the recipe needs to be followed exactly.
Pick produce that will stay crisp
The last of the garden produce can be beautiful, but not every piece belongs in a pickle jar. Pickling cannot rescue vegetables that are soft, bruised, moldy, or overripe. It preserves quality, it does not restore it.
Good choices include:
Small cucumbers
Green beans
Carrots
Radishes
Banana peppers
Jalapeños
Bell peppers
Red onions
Pearl onions
Green tomatoes
Okra
Cauliflower
Use produce as soon as you can after picking. Cucumbers especially lose crispness quickly. If you cannot process them right away, keep them chilled.
For cucumbers, trim off the blossom end. It contains enzymes that can soften pickles. You only need to remove a thin slice. For beans and carrots, trim and cut them to fit the jar. For peppers, remove stems and slice, unless the recipe calls for whole peppers.
A mixed jar can be a great way to use small amounts. Green beans, carrot sticks, garlic cloves, and dill make a sturdy garden pickle. Sliced green tomatoes with onion and pepper flakes make a tangy sandwich topping. Banana peppers and onions are excellent on pizza, tacos, or scrambled eggs.
Gather the basic tools before you begin
Pickling goes much smoother when everything is ready before the brine starts boiling. You do not need a full pantry of specialty equipment, but a few tools make the work safer and cleaner.
My favorite basics include:
Ball mason jars Wide-mouth pint jars are easy to pack and easy to clean. Quarts are useful for long cucumber spears, but pints are more practical for mixed garden batches.
Two-piece canning lids and bands Use new flat lids for water bath canning. Bands can be reused if they are not rusty or bent.
Jar lifter This is one of the tools that feels optional until you try to lift hot jars from boiling water. Then it becomes essential.
Wide-mouth canning funnel It keeps brine off the rim and makes packing vegetables less messy.
Bubble remover and headspace tool A chopstick can help for refrigerator pickles, but a headspace tool is handy for canned batches.
Large stockpot or water bath canner The pot needs to be deep enough to cover jars with at least 1 inch of boiling water during processing.
Kitchen scale A scale helps when recipes list produce by weight instead of volume.
Pickling salt Pickling salt dissolves cleanly and does not contain anti-caking agents that can cloud brine.
You can make refrigerator pickles with less, but for pickling, canning shelf-stable jars, the right equipment matters.
Some links on this page are affiliate links, which means I may earn a commission if you make a purchase through them at no extra cost to you. Your support helps me continue creating valuable content, and I appreciate your trust.

Build a safe brine
A basic pickle brine starts with vinegar, water, salt, and sometimes sugar. The vinegar does the heavy lifting for acidity, which is what makes pickled vegetables tangy and, in tested canning recipes, safe for water bath processing.
For canned pickles, use vinegar labeled 5% acidity. Most standard distilled white vinegar and apple cider vinegar in U.S. grocery stores meet this, but check the label. Do not reduce the vinegar in a canning recipe. Do not add extra water. Do not thicken the brine unless the tested recipe says to.
For refrigerator pickles, you have more room to adjust flavor because the jars stay cold. A simple starting brine is:
1 cup vinegar
1 cup water
1 tablespoon pickling salt
1 to 2 tablespoons sugar, if you like a softer tang
Bring the brine to a simmer, stir until the salt and sugar dissolve, and pour it over packed vegetables. For faster flavor, use hot brine. For extra crunch in refrigerator pickles, let the brine cool before pouring it over delicate vegetables.
Common flavor add-ins include:
Dill seed or fresh dill
Mustard seed
Coriander seed
Black peppercorns
Garlic cloves
Bay leaves
Crushed red pepper
Celery seed
Turmeric
Ginger slices
Go easy with garlic and strong spices at first. Pickles develop more flavor as they sit. A jar that tastes mild on day one may taste bold by the end of the week.
Follow the basic pickling steps
The steps below work well for refrigerator pickles and also show the rhythm of water bath pickling. If you are canning for shelf storage, use a tested recipe for exact ingredient amounts, jar size, headspace, and processing time.
1. Wash and sort the produce
Rinse vegetables under cool running water. Rub away soil, especially around cucumber bumps, carrot tops, and bean stems. Cut away bruised spots. Discard anything slimy, moldy, or soft.
Group vegetables by firmness. Carrots, beans, and cauliflower can handle hot brine well. Thin onion slices and tender peppers soften faster.
2. Prepare the jars
For refrigerator pickles, wash jars, lids, and bands in hot soapy water and rinse well.
For water bath canning, jars must be clean and hot before filling. Keep them warm so they do not crack when hot brine goes in. Follow the lid manufacturer’s directions for preparing lids.
3. Cut vegetables evenly
Even pieces pickle more evenly. Slice cucumbers into coins or spears. Cut carrots into sticks. Trim beans to jar height. Slice onions thin. Leave tiny peppers whole only if your tested recipe allows it, and always follow recipe directions for piercing or cutting.
Pack jars snugly but not so tightly that brine cannot flow around the vegetables.
4. Add spices and aromatics
Place spices in the bottom of each jar or layer them between vegetables. This helps flavor spread through the brine.
A reliable pint jar combination is:
1 garlic clove
1 teaspoon dill seed or a small dill head
1/2 teaspoon mustard seed
A few peppercorns
A pinch of red pepper flakes
For sweeter pickles, add more sugar to a tested sweet pickle recipe rather than changing a savory canning recipe on your own.
5. Pour in the brine
Use a funnel and cover the vegetables fully. For refrigerator pickles, leave a little room at the top so the lid does not push brine out when closed.
For canned pickles, use the headspace required by the tested recipe. Headspace affects sealing and safety, so do not guess.
6. Remove trapped air
Slide a bubble remover, clean chopstick, or thin spatula around the inside of the jar. This releases air pockets. Add more brine if the level drops.
Wipe the rim with a clean damp cloth. A clean rim helps the lid seal properly.
7. Close the jars
For refrigerator pickles, add the lid and tighten it. Let the jar cool if you used hot brine, then refrigerate.
For canned pickles, center the lid and screw the band on fingertip-tight. Do not crank it down hard. Air needs to escape during processing.
8. Process canned pickles if the recipe calls for it
Place filled jars in a boiling-water canner with a rack. Water should cover the jars by at least 1 inch. Start timing when the water returns to a full boil.
Processing time varies by recipe, jar size, vegetable, and altitude. Always use the time listed in a tested recipe and adjust for altitude when needed.
When processing is done, turn off the heat, remove the lid, and let jars rest briefly before lifting them out. Set them on a towel where they can sit undisturbed.
9. Check the seals and store properly
For canned jars, let them cool for 12 to 24 hours. Check that the lids have sealed. The center should not flex up and down when pressed. Remove the bands, wipe jars if needed, label them, and store them in a cool, dark place.
If a jar does not seal, refrigerate it and eat it soon.
For refrigerator pickles, give them at least 24 hours before tasting. Thicker vegetables often taste better after several days.
Keep pickles crisp and bright
Soft pickles are disappointing, but a few habits help.
Use the freshest vegetables you can. Chill cucumbers before pickling. Trim blossom ends. Do not overcook the brine with the vegetables unless the recipe calls for it. For refrigerator pickles, cool the brine before pouring it over extra-crisp vegetables.
Some canners use pickle crisp, which is calcium chloride, in tested amounts. It can help texture, especially with cucumbers. Follow the product label and the recipe. Do not use old-fashioned lime soaking unless you are following a tested recipe that explains the rinsing steps clearly.
If you want to make pickles nice and crispy the old-school way, try using grape or oak leaves. The tannins in the leaves do the trick. Just toss in 1-2 leaves per jar.
Color also matters. Red onions turn pink and gorgeous in vinegar. Green beans may dull a little after processing. Turmeric gives cauliflower a warm golden color. Apple cider vinegar adds flavor but can tint pale vegetables. Distilled white vinegar gives the cleanest-looking brine.
Try small batches from the last harvest
Small batch pickling is perfect at the end of the garden because you can work with what is left. You do not need a bushel of cucumbers.
Try these simple combinations:
Garden produce | Flavor idea | Best use |
Green tomatoes and onions | Garlic, mustard seed, celery seed | Burgers and sandwiches |
Carrots and jalapeños | Oregano, garlic, white vinegar | Tacos and grain bowls |
Green beans | Dill, garlic, peppercorns | Snack boards and salads |
Banana peppers | Onion, mustard seed, touch of sugar | Pizza and sausages |
Cucumbers | Dill, garlic, coriander | Classic pickle spears |
Cauliflower and carrots | Turmeric, mustard seed, ginger | Rice bowls and roasted meats |
If you have only one pint of vegetables, make one pint. A single jar of pickled onions or beans can brighten meals all week.
Label the jars before you forget
Every jar should get a label. At minimum, write the contents and the date. If you like to experiment, add the vinegar type and spice blend too.
A good label might say:
Dill green beans, white vinegar, garlic and mustard seed, 10/14/2026
That small habit makes next year easier. You will know which jars disappeared first and which spice mix needs adjusting. It also helps you rotate your pantry if you process shelf-stable jars.
Store canned pickles in a cool, dark place. Once opened, refrigerate them. Store refrigerator pickles in the fridge from the start and keep vegetables under the brine.
If anything smells off, looks moldy, spurts liquid unexpectedly, or has a loose seal after storage, do not taste it. Discard it.
A few favorite pickling habits
The best pickling routine is the one you will actually repeat. These habits keep the process simple:
Keep a box of jars and lids ready in late summer.
Save small harvests in the fridge for a day or two until you have enough for a batch.
Make brine in a saucepan with a pouring spout if you have one.
Use wide-mouth jars for chunky vegetables.
Keep one notebook page for spice blends that worked.
Make refrigerator pickles when you are tired and canned pickles when you have time to focus.
The end of the garden does not need to feel like a scramble. Pick one vegetable, one jar size, and one reliable recipe. Wash, trim, pack, brine, and label. That is enough.
A few weeks later, when the garden beds are quiet, those jars will bring the crunch back to the table.


Comments